Before you begin
- Open the hosted demo to follow this example.
- Sign in to LightShip as an administrator.
- Use a ClickHouse account with read-only access to the trace source.
- Identify the column or attribute that separates tenants. This guide uses
TenantId.
Starting state
Open Traces, select Admin interface in the role preview control, choose the appropriate time range, and select Apply. The administrator should see the complete dataset before any role is previewed.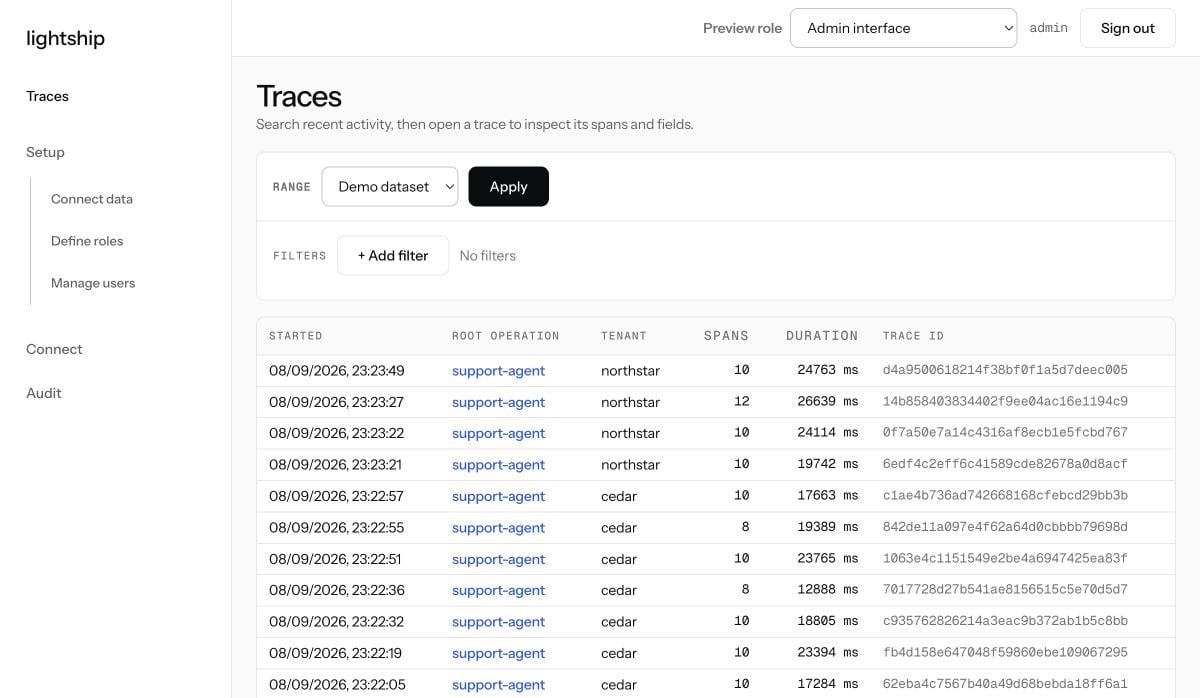
The tenant column contains both
cedar and northstar.1. Connect the trace table
1
Open the trace source configuration
Go to Setup → Connect data.
2
Choose a ClickHouse table
Select Change to discover or choose the table containing your traces.
3
Map the structural fields
Map the trace ID, timestamp, span ID, parent span ID, and span-name fields. Review the mapping
and save it.
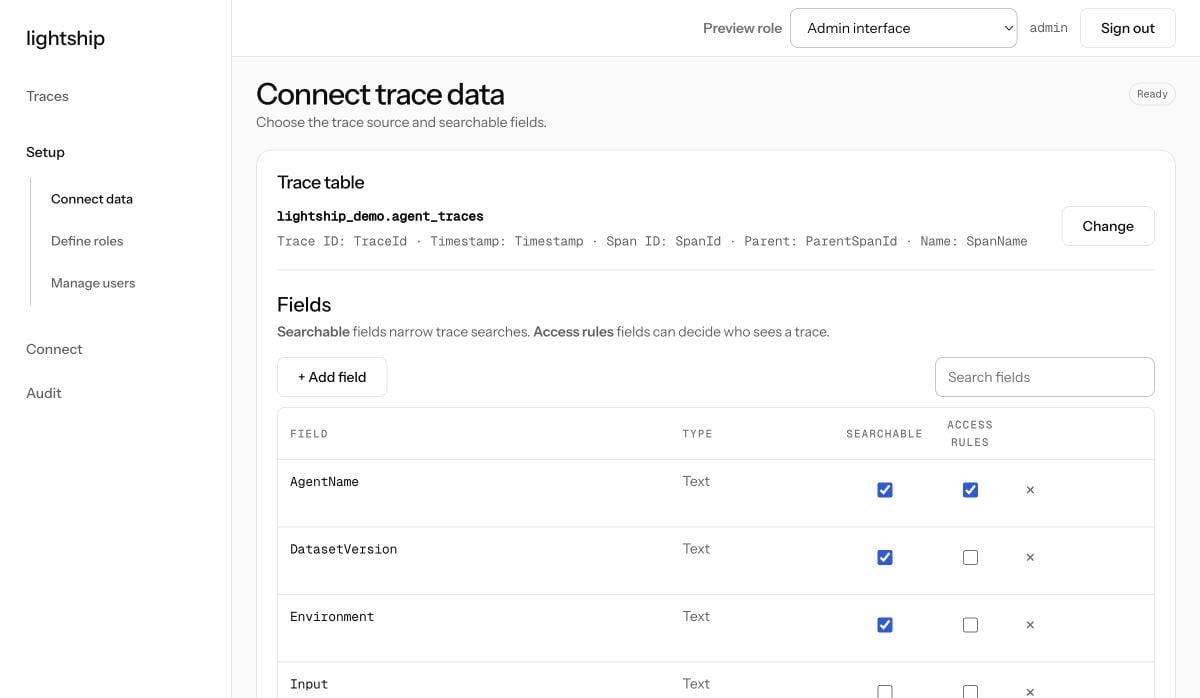
lightship_demo.agent_traces.
The page shows Ready, the selected table, and all five structural mappings.
LightShip is schema-flexible within ClickHouse today. It does not currently support arbitrary
database engines.
2. Configure searchable and policy-accessible fields
Searchable controls whether callers may filter their authorized traces by a field. Access rules controls whether that field may be referenced by a role policy.1
Review the discovered fields
In Connect data, scroll to Fields. Add a field explicitly if a dynamic attribute was not
found during discovery.
2
Choose searchable fields
Enable Searchable for fields users should be able to filter.
3
Choose authorization inputs
Enable Access rules only for fields trusted as authorization inputs. For this example,
enable both controls for
TenantId and AgentName.4
Save the field configuration
Leave tool payload fields disabled unless they are explicitly needed, then select Save fields.
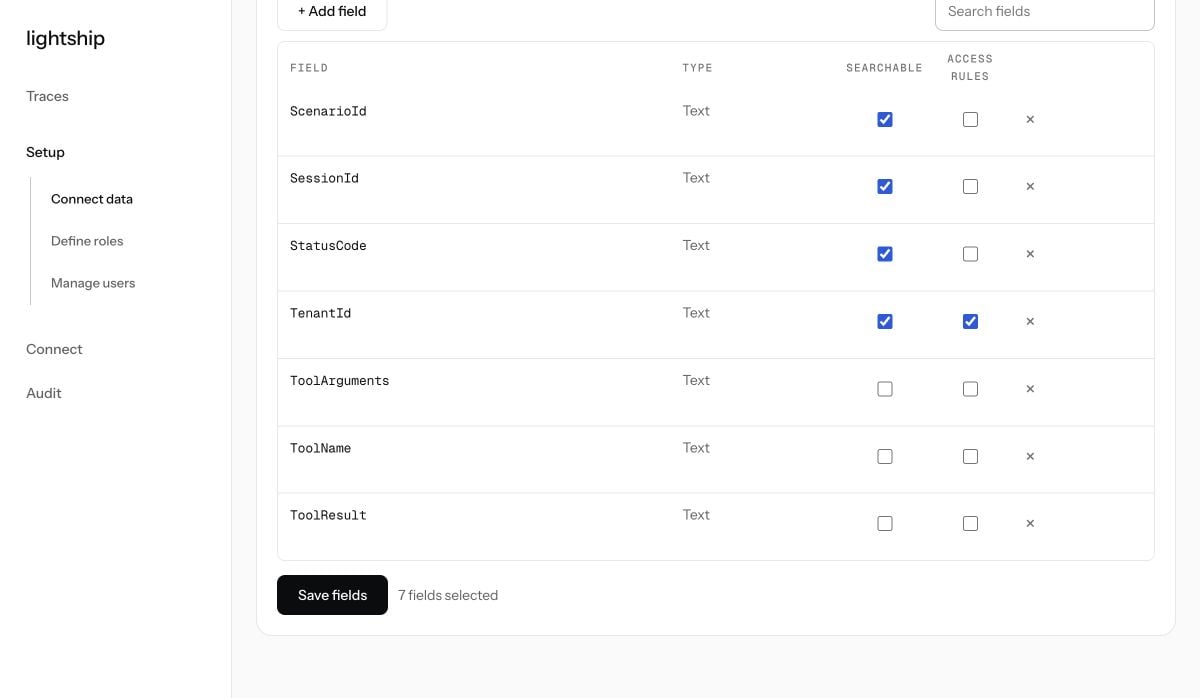
Policy authors can now reference
TenantId and AgentName.3. Create a tenant-scoped role
A role contains the policy LightShip evaluates for every trace request. This example permits Cedar traces created by the support agent.1
Create the role
Open Setup → Define roles, select + New role, and enter
cedar-account-manager.2
Add the tenant condition
Add a condition where
TenantId equals cedar.3
Add the agent condition
Add a second condition where
AgentName equals support-agent.4
Save and verify the expression
Save the role, then expand View policy configuration.
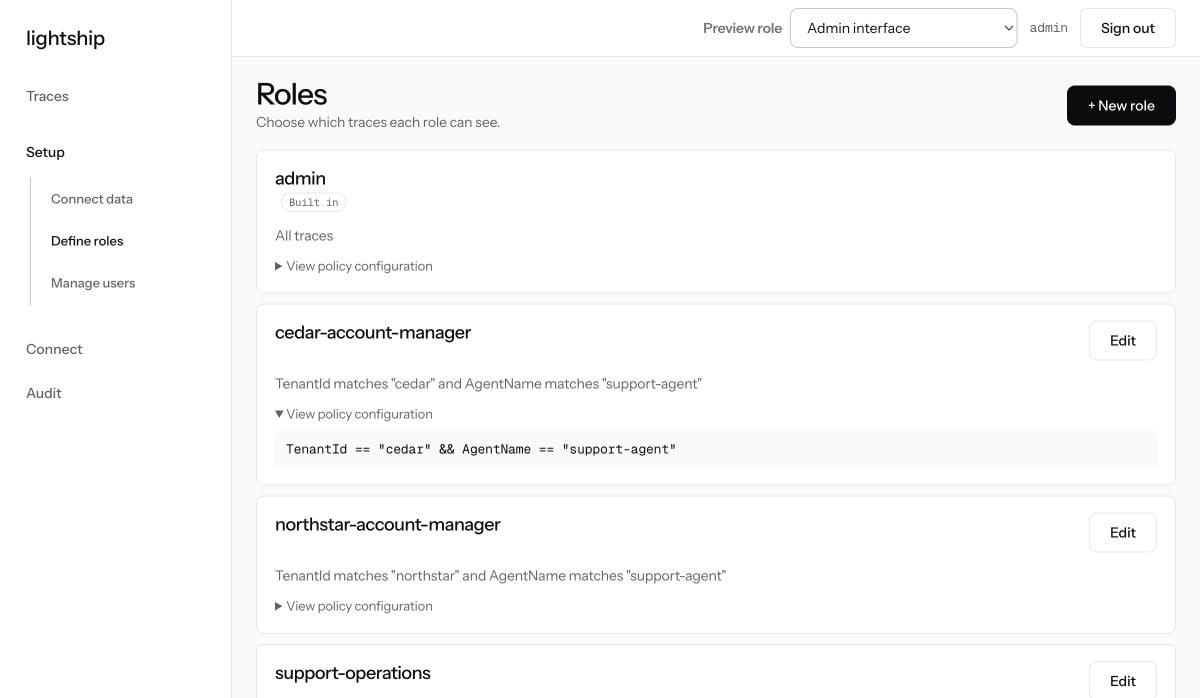
The role card summarizes both conditions and displays the compiled expression shown above.
Reuse one role across tenants
For a reusable role, compare trace metadata with a string attribute attached to the signed-in user:4. Assign the role and user attributes
1
Choose a user
Open Setup → Manage users, then create a user or locate an existing one.
2
Assign the role
Select
cedar-account-manager, then select Save.3
Set identity attributes when required
If the policy uses
user.tenant_id, set the attribute through the admin API.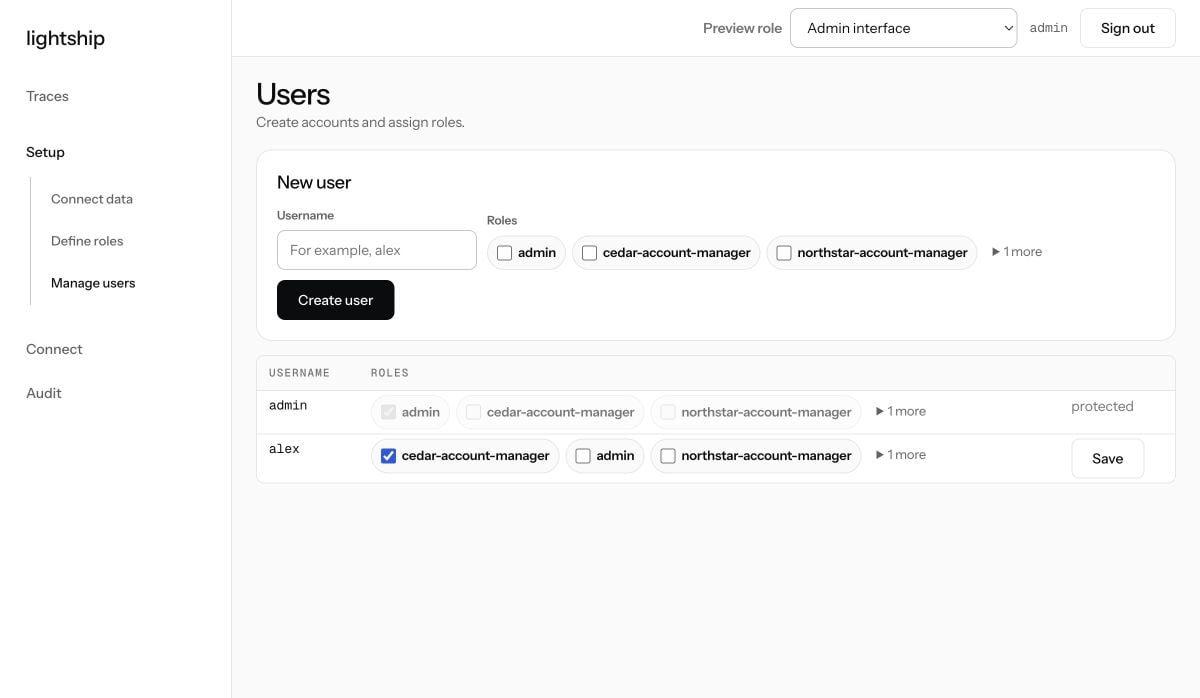
The role is assigned. A saved tenant attribute is immediately available as
user.tenant_id.5. Review the ClickHouse optimization report
RequestGET /schema/optimizations or run the setup MCP tool lightship_optimizations. LightShip
returns advisory DDL and never changes ClickHouse itself.
TenantIdis already the first field in the sorting key, so tenant comparisons are range scans.AgentNameis not covered by the sorting key or a skip index, so LightShip recommends a bloom-filter index.
The hosted table’s sorting key is
TenantId, Timestamp, TraceId, SpanId. LightShip generated the
recommendation above on September 9, 2026; no DDL was executed. Review and schedule index
materialization like any other production schema change.6. Verify the policy with role preview
Test an allowed trace and a trace outside the role’s tenant before distributing credentials.1
Preview the role
Open Traces and choose
cedar-account-manager from Preview role.2
Confirm allowed traces
Apply the demo time range and confirm every visible row has tenant
cedar.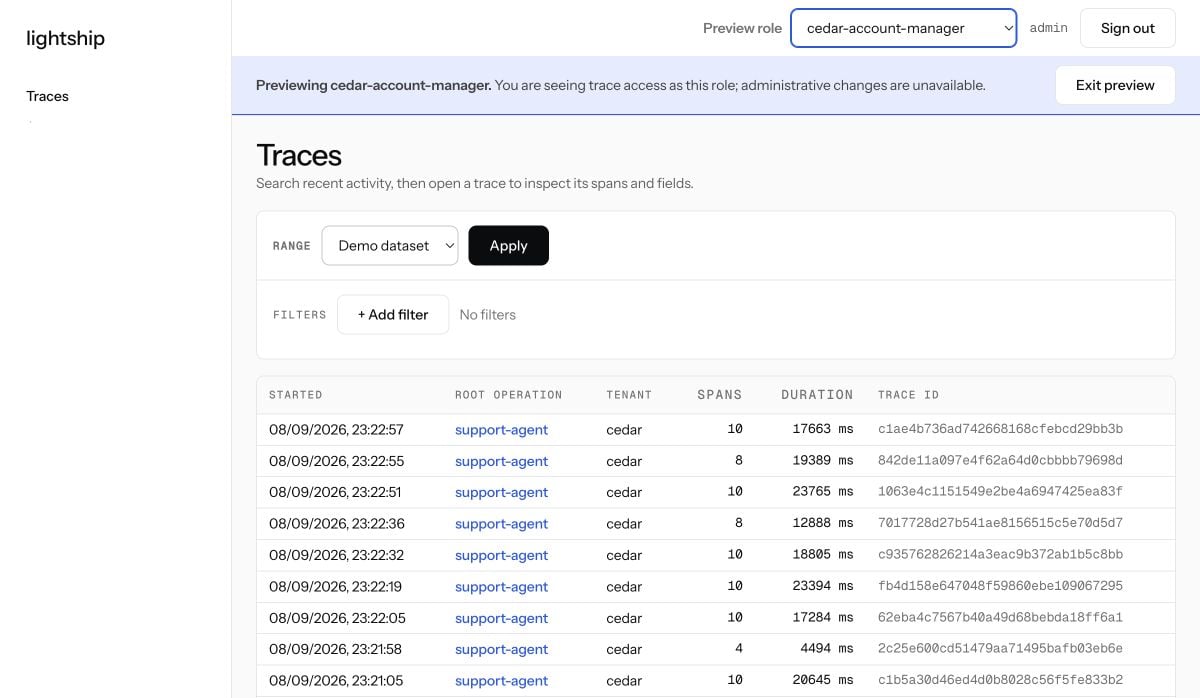
1
Add a trace ID filter
Select + Add filter, choose
TraceId and the == operator, and enter the ID of a known
Northstar trace.2
Apply the filter
Select Apply.
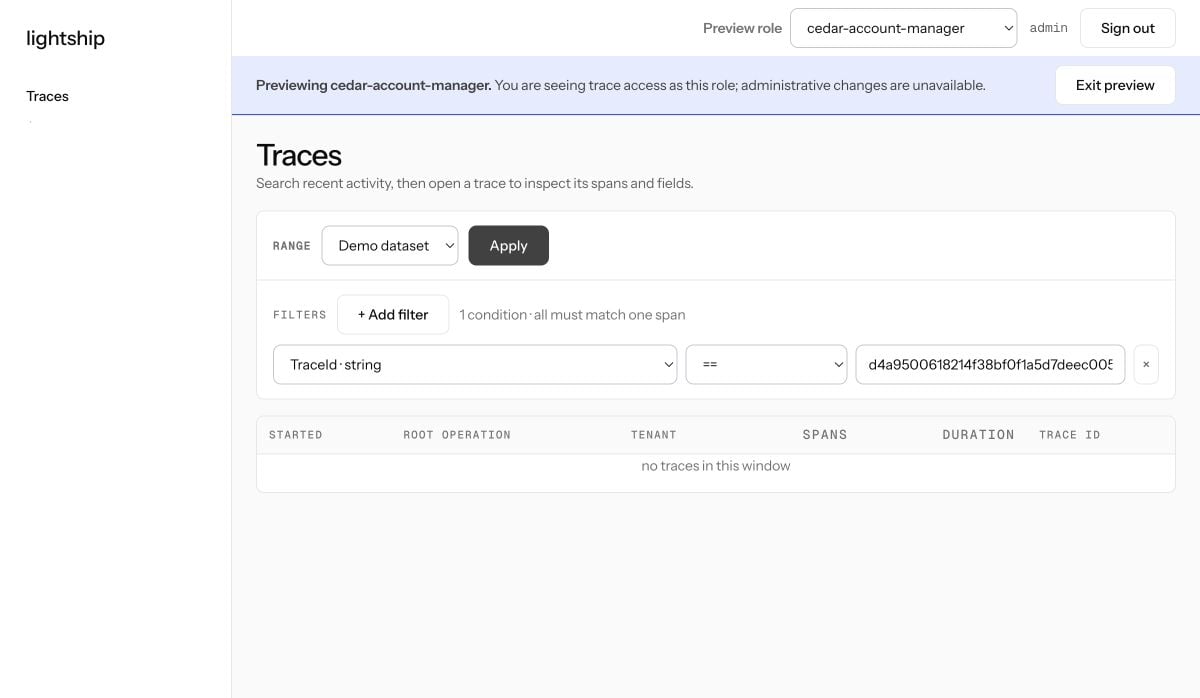
The lookup returns no traces. An unauthorized trace and a nonexistent trace produce the same
result.
7. Investigate the demo traces with MCP
Follow the MCP connection guide to connect Codex or Claude, then begin with the question a product or operations owner would naturally ask:We’ve been hearing that refunds aren’t going smoothly. Can you look across our support-agent sessions from September 8 and tell me what seems to be going wrong and how widespread it is?Then drill into the evidence:
Show me one session that makes the stale-policy problem really clear. Give me the session ID and then briefly explain what the customer asked, what policy the agent used, and what the backend decided.
Give me one representative session for the refund-service problem too. Was the refund known to have failed, or was the outcome uncertain?Finally, turn the investigation into an operational question:
Give me all customers for whom the refund service timed out and we did NOT escalate it to the human, we need to reach out to them.These prompts exercise aggregation across the full trace population, evidence-backed drill-down, and grounded handling of missing data. The final answer should explain that this demo contains order identifiers but no customer names or contact details instead of inventing them.
Current behaviour
If a caller is authorized for a trace, LightShip returns the complete trace. Field-level redaction and content classification are not available today. Before production rollout, confirm that trace-level authorization is sufficient for the data in scope and avoid exposing payload fields unless required.What would you want to see next?
We are looking for feedback from teams operating multi-tenant agent traces. Tell us which
capabilities would make LightShip work better in your environment—identity-provider integration,
richer policy controls, redaction, or something else.